

Best Graphics Settings to Boost FPS Without Sacrificing Visuals
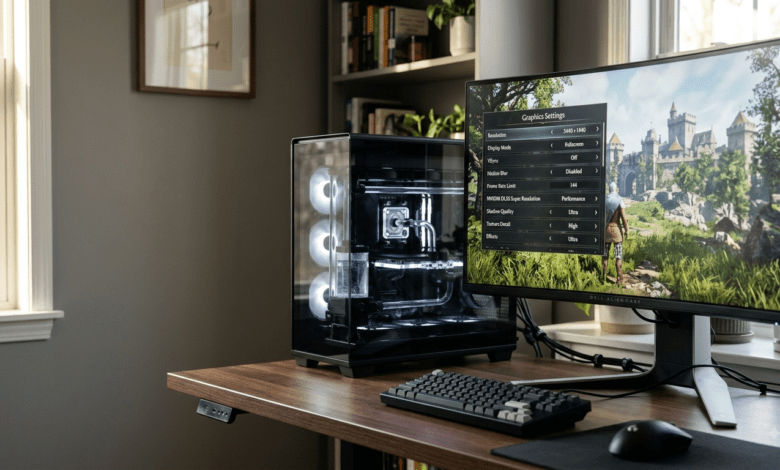
Quick Settings Comparison Table for best graphics settings to boost FPS
Note: Performance and visual impact vary based on game engine optimization, hardware configuration, and screen resolution.
| Graphics Setting | Performance Cost (FPS Impact) | Visual Quality Impact | Recommended Starting Setting |
| Resolution | Very High | Very High | Native or Upscaled (Quality) |
| Ray Tracing / Path Tracing | Very High | High | Off or Medium |
| Volumetric Effects (Fog/Clouds) | Medium–High | Medium | Medium |
| Shadow Quality | High | Medium | High |
| Reflections (Screen Space) | Medium–High | Medium–High | High |
| Global Illumination | High | High | High |
| Foliage & Vegetation | Medium | Medium | High |
| Level of Detail (LOD) | Medium | Medium | High |
| Crowd Density | Medium (CPU-heavy) | Low–Medium | Medium |
| Water Quality | Low–Medium | Low–Medium | High |
| Hair / Fur Simulation | Medium | Low–Medium | Medium or Off |
| Effects Quality | Medium | Medium | High |
| Ambient Occlusion (AO) | Medium | Medium | High |
| Anti-Aliasing | Low–Medium | Medium–High | TAA / Upscaler Built-in |
| Texture Quality | Low (if VRAM is sufficient) | Very High | High or Ultra |
| Post-Processing | Low | Low–Medium (Preference) | User Preference |
Nothing ruins an immersive gaming session faster than erratic frame rates, stutters, or heavy input lag. When games start to slide below smooth performance, the knee-jerk reaction for many PC gamers is simple: open the options menu and slide the global preset straight to “Low.”
While dragging every slider to its lowest setting will undoubtedly increase frame rates, it turns modern, visual masterpieces into muddy, flat render pipelines.
Finding the best graphics settings to boost FPS isn’t about gutting a game’s visuals; it’s about strategic optimization. Modern rendering engines utilize dozens of distinct graphic pipelines, each demanding a vastly different toll on your graphics card (GPU) and processor (CPU). Some settings eat up massive amounts of processing power while delivering barely noticeable visual returns. Others cost almost zero performance yet dramatically preserve image crispness and depth.
The core principle of PC optimization is straightforward: reduce high-cost settings that offer diminishing visual returns, while preserving high-impact settings that maintain image fidelity.
Understanding how individual graphics settings interact with your hardware allows you to unlock higher frame rates, smooth out frame times, and keep games looking sharp, vibrant, and detailed.
Best Graphics Settings to Boost FPS
To optimize graphics settings effectively, it helps to analyze settings individually. Here is how major graphics options impact performance and visual presentation, ranked roughly from most demanding to least cost-intensive.
+-----------------------------------------------------------------------+
|                    GRAPHICS SETTINGS IMPACT SPECTRUM                  |
+-----------------------------------------------------------------------+
  HEAVY FPS IMPACT (Lower First)             LOW FPS IMPACT (Keep High)
  [Ray Tracing] -> [Volumetrics] -> [Shadows] -------> [Textures (VRAM)]
1. Resolution & Render Scale
Resolution determines the total number of pixels your GPU renders per frame:
-
1080p (Full HD): $1920 \times 1080 = \text{2.07 million pixels}$
-
1440p (Quad HD): $2560 \times 1440 = \text{3.68 million pixels}$ (78% more pixels than 1080p)
-
4K (Ultra HD): $3840 \times 2160 = \text{8.29 million pixels}$ (300% more pixels than 1080p)
Because pixel count scales quadratically, pushing raw 4K quadruples pixel rendering math over 1080p. If your GPU is struggling, running at a monitor’s non-native resolution (e.g., setting a 4K display to 1080p directly) often results in blurry spatial scaling.
Recommendation: Always keep your display’s display resolution at native to maintain interface sharpness. Instead of dropping output resolution, utilize modern spatial/temporal upscalers or dynamic resolution scaling (DRS) to render game geometry internally at a lower resolution while reconstructing a sharp image.
2. Upscaling (DLSS, FSR, XeSS)
Spatial and temporal reconstruction algorithms have shifted how games render frames. Instead of natively calculating every pixel, the engine renders a lower internal resolution (e.g., 1080p) and uses temporal vectors or machine learning networks to reconstruct the final image (e.g., 1440p or 4K).
-
Quality: Internal resolution is roughly 67% of native per axis. Provides a major FPS boost with image quality that frequently rivals or occasionally surpasses native rendering thanks to built-in temporal anti-aliasing (TAA) reconstruction.
-
Balanced: Internal resolution is roughly 58%. Excellent balance for 1440p or 4K displays.
-
Performance: Internal resolution is 50% (e.g., rendering 1080p to output 4K). Great for high-resolution displays on mid-range hardware.
-
Ultra Performance: Internal resolution is 33%. Intended primarily for 8K targets or extreme performance recovery; can introduce visual artifacts, soft textures, and shimmering motion blur.
Recommendation: If upscaling is available in a modern title, setting it to Quality mode is single-handedly the most effective way to improve gaming performance without sacrificing visual quality.
3. Ray Tracing & Path Tracing
Ray tracing replaces traditional rasterized approximations with simulated physical light rays that bounce off surfaces, generating mathematically accurate reflections, shadows, and global illumination. Path tracing takes this further by path-calculating virtually all lighting in real-time.
While visually stunning, ray tracing imposes an enormous performance penalty, often slashing native frame rates by 40% to 60% or more due to heavy BVH (Bounding Volume Hierarchy) traversal calculations.
Recommendation: If your primary goal is maximizing frame rates or keeping frame times smooth on mid-range hardware, turn Ray Tracing Off. If you possess a high-end GPU and wish to experience enhanced lighting, set Ray Tracing to Medium, or restrict it strictly to Ray-Traced Reflections/Global Illumination while leaving Ray-Traced Shadows disabled.
4. Shadow Quality
Shadows ground game worlds in reality, preventing objects from looking like they are floating. However, rendering high-resolution shadow maps, cascading shadow maps across large viewing distances, and computing soft contact shadows require considerable GPU compute cycles and draw calls.
Ultra shadow presets often render shadow maps at double or quadruple the memory footprint of High settings, calculating minute details hundreds of meters away that players rarely notice during active gameplay.
Recommendation: Set Shadow Quality to High or Medium. Dropping from Ultra to High often yields a 10% to 15% frame rate increase while preserving crisp close-up shadows and realistic ambient depth.
5. Volumetric Effects (Fog, Lighting, & Clouds)
Volumetric fog, atmospheric god rays, and dynamic cloud systems use 3D voxel grids or ray-marching techniques to calculate light passing through particulate matter. Ray-marching through dense volumetric grids at native resolution severely taxes shader pipelines, especially in outdoor or open-world titles.
Recommendation: Lower Volumetric Fog, Volumetric Lighting, and Clouds to Medium. This reduces rendering step resolution for atmospheric fog while retaining 80–90% of the visual ambiance and providing a measurable FPS gain.
6. Global Illumination (GI)
Global illumination determines how light bounces off surfaces to illuminate surrounding objects indirectly. Modern games utilize software-based GI (like Unreal Engine 5’s Lumen) or hardware-accelerated ray-traced GI. Ultra global illumination models calculate multiple light bounces across high-detail geometry.
Recommendation: Set GI to High or Medium. Lowering GI from Ultra reduces the calculation frequency and ray sample density, restoring significant GPU headroom without turning indirect lighting flat.
7. Reflections & Screen-Space Reflections (SSR)
Reflections add realism to wet asphalt, glass, and water bodies. Standard screen-space reflections (SSR) trace rays through pixel data already present on your display screen. High or Ultra SSR settings render reflections at full screen resolution and trace extended ray distances, causing performance drops near water or reflective interiors.
Recommendation: Lower SSR to Medium or High. This scales reflection render buffers to half-resolution, maintaining realistic surface gloss without demanding full-frame rendering penalties.
8. Level of Detail (LOD) & Geometry Detail
Level of Detail controls how far away high-polygon 3D models render before swapping out for lower-polygon variants. Pushing LOD to Ultra forces your GPU to render high-detail geometry across distant landscapes, increasing total triangle counts and driving up CPU draw calls.
Recommendation: Set LOD to High. In fast-moving games, the visual difference between High and Ultra at long distances is difficult to spot, but setting it to High noticeably reduces both GPU vertex rendering and CPU draw call overhead.
9. Foliage & Vegetation Density
Dense grass, bushes, and tree leaves require drawing thousands of overlapping, semi-transparent textures (alpha testing/blending). High foliage density strains pixel fill rates and forces GPUs to calculate complex shadow intersections across millions of leaves.
Recommendation: Set Foliage to Medium or High. Reducing grass density slightly clears up peripheral clutter—which can actually improve enemy visibility in competitive titles—while delivering smoother frame pacing in dense forest biomes.
10. Ambient Occlusion (AO)
Ambient Occlusion creates subtle, soft contact shadows where surfaces meet (e.g., corners, under furniture, folds in clothing). Popular methods include Screen-Space Ambient Occlusion (SSAO), Horizon-Based Ambient Occlusion (HBAO), and Ground Truth Ambient Occlusion (GTAO).
Without AO, game scenes feel flat and plastic. Fortunately, modern AO implementations are well-optimized.
Recommendation: Keep Ambient Occlusion Enabled (set to SSAO or High). Disabling AO makes a game look flat for a negligible performance gain (typically only 3–5% FPS difference).
11. Texture Quality & Texture Filtering
Texture quality dictates the resolution of the image files wrapped over 3D models. Unlike ambient occlusion or volumetrics, texture quality is almost entirely bound by video memory capacity (VRAM), not active GPU core compute horsepower.
If your graphics card has enough VRAM to hold high-resolution texture packs, running Textures at High or Ultra costs virtually zero frame rate performance. However, if texture memory demands exceed your card’s physical VRAM buffer, the GPU is forced to swap data back and forth over the PCIe bus to system RAM, causing severe stuttering and frame drops.
VRAM Allocation Check:
[VRAM Requirement <= Available VRAM] ===> 0% FPS Loss (Run High / Ultra Textures)
[VRAM Requirement >  Available VRAM] ===> Severe Stuttering (Lower Texture Quality Immediately)
Recommendation: Match your Texture Quality directly to your card’s physical VRAM:
-
4 GB VRAM: Medium (1080p)
-
6 GB – 8 GB VRAM: High (1080p / 1440p)
-
12 GB+ VRAM: Ultra (1440p / 4K)
-
Anisotropic Filtering / Texture Filtering: Set to 16x. Modern GPUs handle anisotropic filtering efficiently; dropping it causes blurry textures at steep angles for negligible FPS gains.
12. Anti-Aliasing (AA)
Anti-aliasing smooths out harsh, jagged edges (“jaggies”) on geometric lines. Common variants include:
-
FXAA (Fast Approximate AA): Post-process filter. Extremely fast, but blurs the entire image.
-
SMAA (Subpixel Morphological AA): Sharp post-process filter. Minimal performance cost, but struggles with temporal shimmer in motion.
-
MSAA (Multi-Sample AA): Legacy hardware-based method. High visual fidelity, but massive performance cost. Rare in modern deferred renderers.
-
TAA (Temporal Anti-Aliasing): Samples frame history over time. Excellent at eliminating motion shimmering, but can introduce motion blur or ghosting if uncalibrated.
Recommendation: Use TAA or rely on the native anti-aliasing built into temporal upscalers like DLSS, FSR, or XeSS. Upscaling algorithms incorporate temporal data directly into their reconstruction pipelines, making separate AA passes redundant.
13. Water Quality
Water quality governs wave physics simulation, sub-surface scattering, and dynamic water reflections. Standard lakes and oceans look convincing on medium-to-high settings, but Ultra modes invoke complex mesh displacement and dynamic physics calculations.
Recommendation: Set Water Quality to High or Medium.
14. Hair & Fur Simulation
Specialized hair rendering systems (e.g., NVIDIA HairWorks, AMD TressFX, or custom strand-based hair engines) convert polygon hair meshes into tens of thousands of individual dynamic geometric strands. Strand-based hair rendering requires significant alpha-sorting, dynamic physics calculations, and high shadow sampling.
Recommendation: Set to Medium or Off if experiencing performance dips during close-up character cutscenes or intense combat.
15. Effects Quality & Particle Systems
Particle effects drive sparks, explosions, spell magic, dynamic smoke, and debris. While resting performance costs are low, intense combat sequences with dozens of overlapping particle streams can cause sudden, momentary frame rate drops.
Recommendation: Set Effects Quality to High or Medium. This maintains rich combat visuals while clamping particle density spikes during heavy action scenes.
16. Crowd Density & NPC Simulation
In city-building or open-world RPG titles, crowd density controls how many non-player characters (NPCs) populate streets. Unlike purely GPU-bound graphics settings, crowd simulation relies heavily on the CPU to handle AI pathfinding, collision detection, and logic loops.
Recommendation: Lower Crowd Density to Medium if your frame rate drops in populated city areas, especially if your GPU utilization drops while frame times spike.
17. Post-Processing Effects
Post-processing includes stylized camera filters applied after the frame is rendered:
-
Motion Blur: Simulates camera shutter blur. Disabling it is largely a subjective preference; its performance impact is minimal (1–2 FPS).
-
Depth of Field (DoF): Blurs background or foreground elements during aiming or cutscenes. Minimal performance impact.
-
Chromatic Aberration, Film Grain, Bloom, & Lens Flare: Stylistic camera artifacts. Zero-to-minimal performance impact; enable or disable according to personal aesthetic preference.
Recommendation: Adjust according to visual taste. Disabling Motion Blur and Film Grain yields clearer motion clarity in fast-paced games, but will not yield meaningful performance gains on modern GPUs.
Best Settings Presets for Different Gaming PCs
While every hardware configuration is unique, these baseline configurations provide strong starting points for balancing performance and visual quality.
+---------------------------------------------------------------------------------+
|                       RECOMMENDED PRESETS BY HARDWARE CLASS                     |
+----------------------+----------------------+-----------------------------------+
| Preset Target        | Graphics Baseline    | Upscaling Strategy                |
+----------------------+----------------------+-----------------------------------+
| High-End PC          | High / Ultra Mix     | Quality / DLAA / Native           |
| Mid-Range PC         | High / Medium Mix    | Quality Mode (DLSS/FSR/XeSS)      |
| Low-End PC           | Medium / Low Mix     | Balanced / Performance Mode       |
| Competitive FPS      | Low / Custom Mix     | Native / Quality (Reflex/Anti-Lag)|
+----------------------+----------------------+-----------------------------------+
High-End Gaming PC (e.g., RTX 4080/5080, RX 7900/9070 series, High VRAM)
-
Target: 1440p / 4K High Refresh Rate
-
Textures: Ultra (16x Anisotropic Filtering)
-
Shadows: High
-
Ray Tracing: Medium or High (with DLSS Quality)
-
Volumetrics & Fog: High
-
Level of Detail: High
-
Upscaling: DLSS / FSR Quality or Native (DLAA)
Mid-Range Gaming PC (e.g., RTX 3060/4060/5060, RX 6700/7700, 8–12 GB VRAM)
-
Target: 1080p / 1440p 60–120+ FPS
-
Textures: High
-
Shadows: Medium or High
-
Ray Tracing: Off
-
Volumetrics & Fog: Medium
-
Reflections & SSR: Medium
-
Level of Detail: High
-
Ambient Occlusion: Enabled (SSAO)
-
Upscaling: DLSS / FSR / XeSS Quality
Low-End or Older Gaming PC (e.g., GTX 1660, RX 580, Integrated Graphics, 4–6 GB VRAM)
-
Target: 1080p 60 FPS
-
Textures: Medium
-
Shadows: Low or Medium
-
Ray Tracing: Off
-
Volumetrics & Fog: Low or Medium
-
Reflections: Low
-
Level of Detail: Medium
-
Crowd Density: Low
-
Upscaling: FSR / XeSS Balanced or Performance
Competitive FPS Settings
In fast-paced, multi-player shooter titles (e.g., Counter-Strike 2, VALORANT, Call of Duty, Fortnite, Apex Legends, Overwatch 2), the objective shifts away from cinematic realism. Competitive settings prioritize maximum frame rates, consistent frame pacing, minimal input latency, and clear target visibility.
+-----------------------------------------------------------------------+
|                    COMPETITIVE SETTINGS PROFILE                       |
+-----------------------------------------------------------------------+
  [Global Preset: Low/Medium]   ---> Reduces visual clutter & particle smoke
  [Textures: High]              ---> Keeps player models/weapons sharp
  [Shadows: Medium/High]        ---> Renders player shadows around corners
  [Motion Blur/Depth of Field]  ---> Disabled for absolute motion clarity
  [NVIDIA Reflex/Anti-Lag]      ---> Enabled + Boost (Minimizes input lag)
Key Competitive Tweaks:
-
Disable Motion Blur & Depth of Field: Eliminates peripheral blur while moving or aiming down sights, granting instant visual feedback.
-
Set Textures to High: Model and weapon textures have negligible performance cost if VRAM is adequate, ensuring sharp crosshairs and target outlines.
-
Set Shadows to Medium/High: Disabling shadows completely removes valuable competitive cues. High shadow settings ensure you can spot enemy shadow projections around corners or through doorways.
-
Lower Effects & Volumetrics: Reduces opaque smoke particles, flashbang blooms, and dynamic screen distortion during combat exchanges.
-
Enable Reflex / Anti-Lag: Turning on NVIDIA Reflex or AMD Radeon Anti-Lag reduces system input latency in GPU-bound scenarios, rendering mouse inputs directly to the frame buffer with minimal queue delay.
DLSS vs. FSR vs. XeSS and Frame Generation
To maximize PC gaming performance today, understanding modern upscaling and frame generation pipelines is essential. Feature availability depends on your specific GPU hardware and game developer implementation.
+---------------------------------------------------------------------------------+
|                        UPSCALING & GENERATION TECHNOLOGY                        |
+------------------+-----------------------+--------------------------------------+
| Technology       | Core Function         | Recommended Usage                    |
+------------------+-----------------------+--------------------------------------+
| NVIDIA DLSS      | AI Temporal Upscaling | Quality Mode on supported RTX GPUs   |
| AMD FSR          | Temporal Upscaling    | Quality Mode on broad GPU hardware   |
| Intel XeSS       | DP4a / XMX Upscaling  | Quality Mode on Intel / All GPUs     |
| Frame Generation | Interpolated Frames   | Single-Player / Base FPS >= 60 FPS   |
+------------------+-----------------------+--------------------------------------+
Temporal Upscaling (DLSS, FSR, XeSS)
-
NVIDIA DLSS (Deep Learning Super Sampling): Uses tensor cores on RTX graphics cards to perform AI-based spatial reconstruction. Offers high image stability and detail retention.
-
AMD FSR (FidelityFX Super Resolution): An open temporal upscaling solution supported across a wide variety of GPUs from AMD, NVIDIA, and Intel. Modern ML-assisted iterations (such as FSR 4 on newer architectures) leverage dedicated AI acceleration while analytical fallbacks maintain broader compatibility.
-
Intel XeSS (Xe Super Sampling): Operates using XMX instructions on Intel Arc graphics hardware, with a DP4a fallback path for competitive performance on cross-vendor GPUs.
Frame Generation
Frame Generation (available via NVIDIA DLSS Frame Generation / Multi Frame Generation and AMD FSR Frame Generation) operates differently from traditional upscaling. Rather than rendering lower-resolution geometry and scaling it up, Frame Generation analyzes motion vectors, optical flow, or ML models across consecutive frames to insert generated intermediate frames.
Traditional Rendering:
[Rendered Frame 1] ------------------------------------> [Rendered Frame 2]

Frame Generation Rendering:
[Rendered Frame 1] -------> [Generated Frame] ---------> [Rendered Frame 2]
Important Frame Generation Rule:
Frame generation increases visual motion smoothness, but it does not reduce mouse or controller input latency. Because generated frames are created speculatively between real rendered frames, the system’s actual input responsiveness remains tied to your base (pre-interpolation) frame rate.
-
Best Practice: Ensure your base rendering performance reaches at least 50 to 60 FPS via standard settings/upscaling before turning on Frame Generation. Enabling Frame Generation at a low native base (e.g., 25 FPS) produces noticeable input lag and motion artifacts.
CPU-Bound vs. GPU-Bound: Finding Your Bottleneck
Before tweaking graphics settings, you need to identify which hardware component is holding back your performance. Adjusting GPU-heavy graphics options will yield zero FPS improvements if your CPU is the bottleneck.
+-----------------------------------------------------------------------+
|                    DIAGNOSING PERFORMANCE BOTTLENECK                  |
+-----------------------------------------------------------------------+
  GPU-BOUND SIGN:
  [GPU Usage: 97%–99%]  ---> Lowering resolution / shadows INCREASES FPS.

  CPU-BOUND SIGN:
  [GPU Usage: 60%–85%]  ---> Lowering resolution DOES NOT increase FPS.
How to Identify a GPU Bottleneck:
-
Monitoring: Your GPU utilization hovers near maximum capacity (97% – 99%).
-
Behavior: Lowering screen resolution, enabling DLSS/FSR, or turning down shadow/reflection settings yields an immediate, direct boost in frame rate.
How to Identify a CPU Bottleneck:
-
Monitoring: GPU utilization stays noticeably below maximum capacity (e.g., 60% – 85%), while individual CPU core threads show heavy activity.
-
Behavior: Lowering resolution or activating aggressive upscaling modes provides almost no increase in total FPS.
-
CPU-Demanding Settings to Lower: If you are CPU-bound, turn down Crowd Density, Level of Detail (LOD), Physics, Vegetation Draw Distance, and Ray Tracing (which requires high CPU overhead to calculate BVH structure updates).
FPS vs. Frame Time: Why Consistency Matters
Most gamers focus entirely on the overall average FPS (Frames Per Second) counter. However, average FPS only tells half the story. The more critical metric for smooth, stutter-free gameplay is Frame Time.
FPS vs. Frame Time Relationship:
Average FPS = Total frames rendered over 1 second.
Frame Time  = Time required to render a single individual frame (measured in ms).
If a game renders 60 frames in a single second, but 50 of those frames take 10 milliseconds each while 10 frames take 50 milliseconds each, the game will stutter severely despite showing a “60 FPS” average counter.
Frame Time Latency Reference:
-
60 FPS $\approx \mathbf{16.67\text{ ms}}$ per frame
-
120 FPS $\approx \mathbf{8.33\text{ ms}}$ per frame
-
144 FPS $\approx \mathbf{6.94\text{ ms}}$ per frame
-
240 FPS $\approx \mathbf{4.17\text{ ms}}$ per frame
Frame Time Consistency Example:
Smooth Pacing: [16.6ms][16.6ms][16.6ms][16.6ms] ---> Feels buttery smooth
Micro-Stutter:  [8.0ms] [35.0ms] [10.0ms] [28.0ms] ---> Feels laggy & erratic
1% Lows and Stutter Prevention:
Pay attention to your 1% Low FPS (the average of the lowest 1% frame times). A stable 90 FPS with tight 1% lows at 75 FPS feels vastly smoother and more responsive than an unstable 140 FPS that constantly drops down to 30 FPS during combat.
Tip: Utilizing Variable Refresh Rate (VRR) technologies like NVIDIA G-SYNC or AMD FreeSync combined with an in-game frame rate cap slightly below your display’s max refresh rate (e.g., capping at 138 FPS on a 144 Hz display) stabilizes frame pacing and eliminates screen tearing.
How to Tune Your Graphics Settings Step by Step
To get the absolute best performance out of your specific rig without wasting time, follow this systematic tuning workflow:
+---------------------------------------------------------------------------------+
|                       STEP-BY-STEP TUNING METHODOLOGY                           |
+---------------------------------------------------------------------------------+
| Step 1: Set In-Game Preset to HIGH (Establish Baseline)                         |
| Step 2: Set Resolution to Native Display Output                                 |
| Step 3: Monitor GPU Utilization via Overlay (Cap Frame Rate OFF for testing)    |
| Step 4: If GPU Usage is 99% ===> Enable Upscaling (Quality Mode)               |
| Step 5: If FPS is still low ===> Drop Ray Tracing, Shadows, & Volumetric Fog     |
| Step 6: Verify VRAM Usage ===> Adjust Textures so VRAM is not maxed out         |
| Step 7: Cap FPS to match display VRR range & lock in stable frame pacing        |
+---------------------------------------------------------------------------------+
-
Set Baseline: Start by selecting the global High preset (not Ultra) at your display’s native resolution.
-
Measure Hardware Baseline: Use an overlay monitoring tool (such as MSI Afterburner, CapFrameX, or built-in game performance overlays) to record your baseline FPS, GPU usage, and VRAM consumption.
-
Check GPU Utilization:
-
If GPU usage is near 99%, you are GPU-bound.
-
If GPU usage sits below 90%, check if lowering CPU-bound settings (LOD, Crowd Density) helps.
-
-
Enable Quality Upscaling: Turn on DLSS, FSR, or XeSS set to Quality mode. In most games, this immediately yields a 25% to 50% FPS boost with minimal visual compromise.
-
Adjust High-Impact Settings: If frame rates remain below your target, drop Ray Tracing to Off, Shadow Quality to High/Medium, and Volumetric Fog to Medium.
-
Protect VRAM Limits: Ensure your selected Texture Quality does not fill 100% of your physical GPU VRAM. Leave a 1 GB buffer to prevent memory swapping stutters.
-
Fine-Tune and Cap: Once you achieve a smooth target frame rate, cap your FPS slightly below your monitor’s maximum refresh rate to ensure stable, low-latency frame pacing.
How to Benchmark Your Settings
When testing different settings configurations, avoid relying on subjective impressions while wandering through quiet game areas.
Rules for Accurate Benchmarking:
-
Use In-Game Benchmarks: If the game includes an automated benchmark sequence, run it. It renders the exact same camera paths, particle effects, and geometry sequences every time, ensuring fair, apples-to-apples comparisons.
-
Test Heavy Combat Scenes: If no built-in benchmark exists, test settings in demanding, high-activity areas—such as a densely populated city hub or an explosive multiplayer firefight—rather than looking at a blank wall in an interior room.
-
Keep Variables Identical: Ensure background applications are closed, driver versions remain identical during testing, and thermal throttling isn’t dragging down hardware performance over long testing sessions.
-
Measure 1% Lows: Record both average FPS and 1% low metrics using tools like CapFrameX or FrameView to verify that your settings adjustments improve overall frame time stability, not just peak numbers.
Common Mistakes to Avoid
-
Assuming “Ultra” Preset is Mandatory: Ultra settings are engineered for future hardware architectures and screenshot capture. Dropping down to High often restores 20% to 30% of your frame rate while remaining visually indistinguishable during active gameplay.
-
Lowering Textures First: Turning textures down to Low while running out-of-date GPU drivers does nothing for core GPU compute pipelines. Leave textures high as long as your VRAM allocation stays within safety limits.
-
Ignoring Input Latency on Frame Generation: Turning on Frame Generation when your native base frame rate is stuttering at 25 FPS will result in floaty, unresponsive controls. Always stabilize native frame rates first.
-
Changing 10 Settings Simultaneously: If you adjust every slider at once, you won’t know which setting fixed your performance or degraded your visual fidelity. Adjust high-impact settings individually.
-
Running Uncapped Frame Rates on Fixed Refresh Monitors: Running 190 FPS on a 60 Hz non-VRR monitor causes screen tearing and unnecessary heat/power generation. Cap frame rates within your monitor’s display capabilities.
FAQ
What graphics settings increase FPS the most?
Resolution, Ray Tracing, Shadow Quality, and Volumetric Effects (Fog/Clouds) have the single largest impact on overall frame rates. Lowering or optimizing these four areas provides the largest performance gains.
Which settings can I lower without losing much visual quality?
Dropping Shadow Quality from Ultra to High, setting Volumetric Fog to Medium, lowering Level of Detail (LOD) to High, and turning down Screen-Space Reflections (SSR) to Medium provides significant FPS recovery while keeping the game looking crisp and realistic.
Should I turn off ray tracing for higher FPS?
Yes. Ray tracing is currently one of the most computationally expensive features in modern real-time graphics. Turning ray tracing off or setting it to Medium often increases frame rates by 40% to 60% or more on mid-range hardware.
Is DLSS/FSR better than lowering resolution natively?
Yes. Running a game at native lower output resolutions (e.g., setting a 1440p monitor to render 1080p directly) causes uniform spatial blur across the entire display. Temporal upscalers like DLSS, FSR, and XeSS use motion vectors and temporal frame history to reconstruct sharp geometry, UI elements, and fine edge details at native display output resolutions.
Does lowering texture quality increase FPS?
Only if your graphics card is running out of physical video memory (VRAM). If your GPU has 8 GB of VRAM and the game requires 6 GB on High textures, dropping to Low textures will yield virtually zero FPS improvement. However, if a game requires 10 GB of VRAM and your card only has 8 GB, lowering texture quality prevents severe VRAM swapping stutters.
Should I use High or Ultra settings?
For almost every PC game, High is the optimal setting. Ultra presets frequently push rendering resolutions, draw distances, and particle counts into regions of severe diminishing visual returns, costing substantial performance for microscopic visual gains.
What is the best setting for competitive FPS games?
Competitive settings prioritize high frame rates, low input lag, and visibility over cinematic effects. Set global presets to Medium/Low, turn off Motion Blur and Depth of Field, set Textures to High, set Shadows to Medium (to preserve spatial player cues), and enable low-latency technologies like NVIDIA Reflex or AMD Anti-Lag.
How can I tell whether my CPU or GPU is causing low FPS?
Monitor component utilization using an overlay tool like MSI Afterburner. If your GPU usage sits at 97%–99%, your system is GPU-bound (lowering graphics settings will increase FPS). If your GPU usage drops below 85–90% while frame rates remain low, your CPU or system memory speed is the primary performance bottleneck.
Maximizing PC gaming performance isn’t about choosing between a glorious 30 FPS slideshow or a hideous 144 FPS mud-fest. By taking a methodical approach to graphics optimization, you can dial in a custom setup that captures the best of both worlds.
Remember the foundational workflow: keep your display at native output resolution, utilize Quality temporal upscaling (DLSS, FSR, or XeSS), pull back high-cost settings like Ultra shadows and volumetrics, ensure your VRAM buffer isn’t maxed out, and lock in a consistent frame time. With your settings tuned for maximum efficiency, you’ll enjoy buttery-smooth responsiveness without losing the stunning visual detail that makes PC gaming so rewarding.